- How do I install a SIMM Module in an HP 5si, 5si MX, and 5si HM printer?
- How do I install a SIMM Module in an HP 5 and HP 5M printer?
- How do I install a SIMM Module in an HP4, HP4M, HP4 Plus, and HP 4M Plus printer?
- How do I install a SIMM Module in an HP4si printer?
- How do install a DIMM Module in an HP 4000 printer?
- How do I install a DIMM Modules in an HP 8000 printer?
- How do I install a cartridges in HP LaserJet 4, 4M, 4 Plus, 4M Plus, 4si, 4si MX, and 4P printers?
- How do I test my cartridge, SIMM or SIMM?
Answers
SIMM boards can be damaged by small amounts of static electricity. When handling the SIMM board exercise care and, if possible, wear an antistatic, wrist strap connected to the metal frame of the printer (or to your antistatic system). During installation, to prevent generation of static electricity, avoid moving about the work area. To avoid damaging the printer or SIMM module, follow these steps:
- In this order, switch the printer power OFF, unplug the power cord, and disconnect any attached cables.
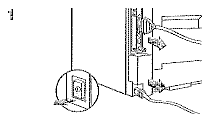
- Loosen (but do not remove) the two captive thumb screws (top and bottom).
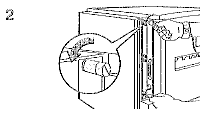
- Grasp -the screws and pull the printer controller board out of the printer. Do not touch any component on the board. Place the board on a flat, nonconductive surface. (For case of replacement, note how the board fits into slots in the printer.)

- Remove the SIMM board from the shipping package. Do not touch any component on the SIMM board. Hold the board with your forefingers on the side edges and your thumbs against the back edge, so the notch on one end is on the right and the metal teeth face toward the SIMM slot.

- Insert the board firmly into an available SIMM slot at about a 20-degree angle.

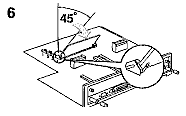
- Rotate the SIMM toward the back of the printer to about a 45-degree angle until it clicks into the metal locking tabs. If it is properly seated, it will not lift away from the slot. (To remove a SIMM, you must first release the metal locking tabs.)
- Align the printer formatted board with the top slot, slide the board back into the printer (A), and tighten the two screws (B).
- Re-attach any cables and -the power cord; then switch the printer power ON and test the SIMM (see the following section).
Testing a SIMM board
Use the procedures below to print a self test to verify SIMM board installation.
- Plug in the power cord and switch the printer ON.
- After a few seconds, the On Line indicator should light and should appear in the control panel display
- Press Menus until TEST MENU appears.
- Press Items until PCL FONT LIST appears.
- Press Select* to print a listing of all fonts on the SIMM Module. Under the ROM Section you should see a listing of your custom fonts.
Back To Top
SIMM boards can be damaged by small amounts of static electricity. Wear an antistatic wrist strap (or frequently touch the surface of the antistatic package or bare metal on the printer) when handling the board, and before installing or removing it.
- Before you begin these steps, turn the printer off and unplug the power cord.
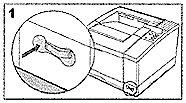
- Rotate the printer so that you have easy access to the right and back sides of the printer.
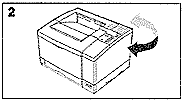
- Loosen the captive screw in the upper left corner of the back panel with a Phillips #2 screwdriver. The screw does not need to be completely removed from the printer.
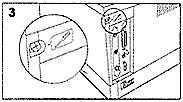
- Slide the right side panel towards the back of the printer (approximately an inch (25 mm)).
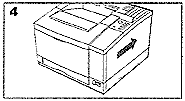
- The panel should now easily open, exposing the SIMM door.
- Loosen the captive screw holding the SIMM door with a Phillips #2 screwdriver. Open the SIMM door.
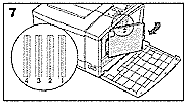
- Note the four SIMM slots (a PostScript SIMM will already be installed in a slot in the HP LaserJet 5M). For easiest installation, fill the slots from right to left, starting with slot 1 (see inset).
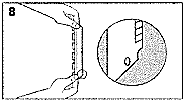
- Remove the SIMM board from the antistatic package. Hold the board with your forefingers on the side edges and your thumbs against the back edge. Hold the board so the notch on one end is on the bottom and the metal teeth face toward the SIMM slot.
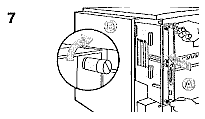
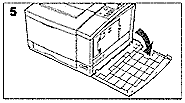
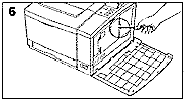
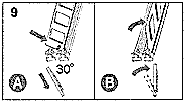
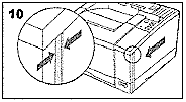
- Hold the SIMM board at a 30-degree angle to the slot and push the edge of the board evenly and firmly into the slot (see A). Rotate the SIMM board to the right until the board "clicks" into the metal locking tabs, securing the board in place (see B). Close the SIMM door and tighten the screw (see picture 6). Set the bottom of the right side panel onto the printer. Make sure the three bottom tabs on the panel align with the corresponding slots on the printer. Fold the cover up. The printer is now in the same condition as picture 4.
- Slide the panel to the left until it becomes firm (1/4 inch gap (7 mm) remaining). Tighten the screw in the upper left corner on the back panel. This will close the remaining gap between the panel and the frame. It is important to correctly align the right side panel and tighten the screw on the back panel before attempting to move the printer.
Testing a SIMM Board
- Plug in the power cord and switch the printer ON.
- After a few seconds, READY should appear in the control panel display.
- Press Menu until PCL FONT MENU appears.
- Press Item until PCL FONT LIST appears.
- Press Select to print a listing of all fonts on the SIMM Module. Under the ROM Section you should see a listing of your custom fonts.
- Press Go to exit menus.
Back To Top
This document contains reprinted material from the Hewlett Packard LaserJet 4 Plus User’s Manual (C2037-90901), pages D2-3
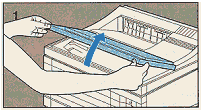
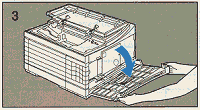
- Switch the printer OFF, unplug the power cord, and life the printer’s top cover up as far as it will go.
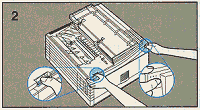
- Push the two right side cover release buttons.
- Remove the right side cover.
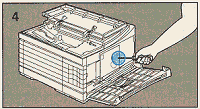
- Use a Phillips #2 screwdriver to loosen the captive screw holding the SIMM door, and open the door.
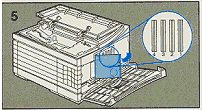
- Through the open door, you can see the four SIMM slots. For easiest installation, fill the slots from right to left, starting with slot 1 (see inset).
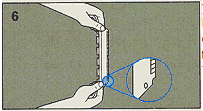
- Remove the SIMM board from the antistatic package. Hold the board with your forefingers on the side edges and your thumbs against the back edge. Hold the board so the notch on one end is on the bottom and the metal teeth face toward the SIMM slot.
-
Install the SIMM Board:
- Hold the SIMM board at a 30-degree angle to the slot and push the edge of the board evenly and firmly into the slot (see A).
- Rotate the SIMM board to the right until the board "clicks" into the metal locking tabs, securing the board in place (see B).
- Replace the SIMM door and screw.
- Replace the right side cover.
- Close the top cover.
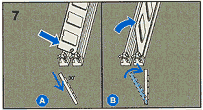
Back To Top
This document contains reprinted material from the Hewlett Packard LaserJet 4 Plus User’s Manual (C2010-90901), pages F5-9. Follow these steps when installing SIMM boards
- Switch the printer OFF and UNPLUG THE POWER CORD.
- Position the printer so the right side panel faces you. (From the front of the printer, the right side is to the right of the printer’s control panel.)
- Position yourself directly in front of the right side panel. (Because of the locations of the SIMM board slots, it is easier to access them whileseated.)
- Use a Phillips #2 screwdriver to remove the two screws at the bottom of the side panel (see figure below).
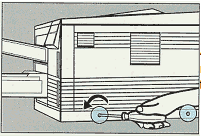
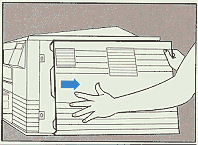
- Remove the plastic side panel by sliding it to the right (figure below).
- Unscrew the 4 screws from the metal plate and remove it (figure below).
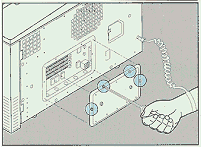
- Through the open panel, you can see the four SIMM board slots (figure above).
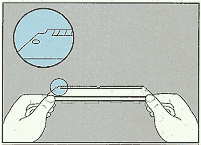
- Remove the board from the antistatic package. Hold the board with your forefingers on the edges next to the holes and your thumbs against the edge on the back, as shown in figure below.
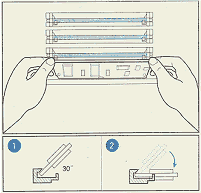
- Hold the board at a 30 degree angle and firmly push it with your thumbs into the slot as shown in figure below. First, push the board into the back of the slot to fully seat it. Then rotate the board down until the clips on the edges of the slot snap into place (you will feel and hear a "click").
- Gently move the board back and forth; if it is seated correctly, it will not lift away from the slot. If it lifts up, the SIMM may not have latched into the slot. Try again.
- Replace the metal cover plate. Do not replace the plastic side panel until after you test the board.
Back To Top
This document contains reprinted material from the Hewlett Packard LaserJet 4000 User’s Manual (C4118-90901), pages C1-4.
- Switch the printer OFF and unplug the power cord. Unplug the power cord and disconnect any cables.
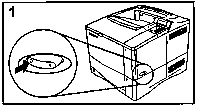
- Grasp the cover (as illustrated) and pull it firmly toward the rear of the printer until it stops.
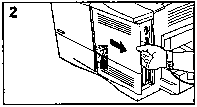
- Remove the cover from the printer.
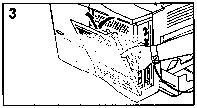
- Loosen the captive screw holding the DIMM access door with a Phillips #2 screwdriver. Open the door.
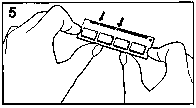
- Remove the DIMM from the antistatic package. Hold the DIMM with fingers against the side edges and thumbs against the back edge. Align the notches on the DIMM with the DIMM slot. (Check that the locks on each side of the DIMM slot are open, or outward.)
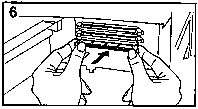
- Press the DIMM straight into the slot (press firmly). Make sure the locks on each side of the DIMM snap inward into place. (to remove a DIMM, the locks must be released).
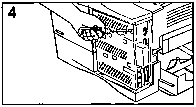
- Close the DIMM access door and tighten the screw.
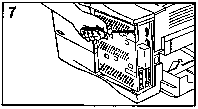
- Set the bottom of the cover onto the printer. Make sure the bottom tabs on the cover fit into the corresponding slots in the printer. Rotate the cover up towards the printer.
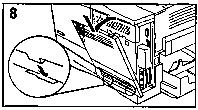
- Slide the cover toward the front of the printer until it clicks into place. Reattach any interface cables and the power cord, then turn the printer on and test the DIMM.
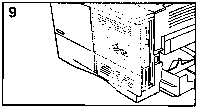
Back To Top
This document contains reprinted material from the Hewlett Packard LaserJet 8000 User’s Manual Appendix C. Consult your manual for the most updated information.
- Turn the printer off. Unplug the power cord and disconnect any cables.
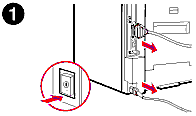
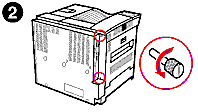
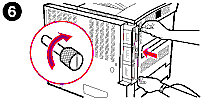
- Loosen the two captive thumb screws on the back of the printer.
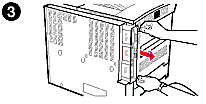
- Grasp the screws and pull the formatter board out of the printer. Place it on a flat, non-conductive surface.
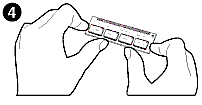
- Remove the DIMM from the anti-static package. Hold the DIMM with fingers against the side edges and thumbs against the back edge. Align he notches on the DIMM with the DIMM slot. (Check that the locks on each side of the DIMM slot are open, or outward).
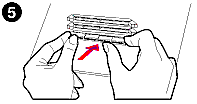
- Press the DIMM straight into the slot (press firmly). Make sure the locks on each side of the DIMM snap inward into place. (to remove a DIMM, the locks must be released).
- Carefully slide the formatter board back into the printer and tighten the two screws.
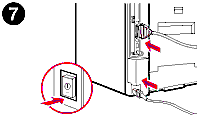
- Plug in the power cord and connect all cables. Turn the printer on.
Back To Top
This document covers the Hewlett Packard LaserJet 4, 4M, 4 Plus, 4M Plus, 4si, 4si MX, and 4P Printers. It also covers any retail versions of these models. This document contains reprinted material from the Hewlett Packard LaserJet 4 User’s Manual, Chapter 4. To install a cartridge into the printer:

- Press On Line to take the printer off line.
- Insert the cartridge into the printer as shown in the figure to the right. The top of the cartridge faces to the right. (Note! In the HP LaserJet 4P, the top of the cartridge faces left).
- Push the cartridge in until you hear a "click". Do not be afraid to push moderately hard.
- Press On Line to return the printer to ready status.
Notes:
- Follow this procedure for an HP LaserJet 4si or 4si MX. These models contain two cartridge slots. It should not matter which cartridge slot you use for RxLASER Electronic Forms.
- In the HP LaserJet 4P, the font cartridge slots are located to the left of the paper trays. Also, the top of the cartridge faces left. This is for the HP LaserJet 4P only.
- Do not insert or remove font cartridges while the printer is on line or while the Form Feed light is on. This disables the printer’s ability to read and access the cartridge fonts and causes a printer message to appear. To recover, switch the printer OFF and back ON again. Any data in printer memory will be lost.
Back To Top
Answer:
NowDocs hardware of all types (forms and font cartridges, SIMMs and DIMMs) act as an extension of your laser printer’s memory. This is done without modifying any of the printer’s language, internals, or menu settings.
NowDocs customers often find it difficult to determine of they have installed the hardware correctly due to its minimal interference with overall workings of the printer. The following tests can be employed to verify that your hardware is being recognized by the printer, and that your forms and fonts are correctly installed.
Print a PCL Font Page
Every laser printer will display all of the fonts it has available to it. If you’ve purchased custom fonts from NowDocs, this test will display them. Also, many forms utilize special fonts and images that will register in the PCL Font Page.
While every printer and even printer model has a different procedure to print a PCL Font Page. Most printers contain this option in a TEST MENU or an INFORMATION MENU. Some printers offer you a choice to print you PCL or PostScript (PS) Fonts. You’ll want to choose PCL fonts.
When the page is completed, most printers produce a series of pages. On the first page is usually the hardware fonts. You’ll spot NowDocs' fonts in these sections.
Use QuickLaser to produce sample forms
If you’ve received NowDocs printer hardware that contains electronic forms. You can print samples of those forms using NowDocs' QuickLaser utility. This Windows based utility runs in Windows 95, Windows 98, and Windows NT 4.0. This utility software performs a number of unique functions, so it may be a valuable download for more than simply printing sample forms.
Back To Top
|